Tutorials
We get lots of questions on how do do things. As we get time we'll put up some step by step tutorials so you can do it yourself. As always, please use common sense when making things and don't hurt yourself. It's not our fault if you follow the pictures and it goes wrong. There is not substitute for having a bit of a think first.
Let us know if there is you have requests for tutorials.
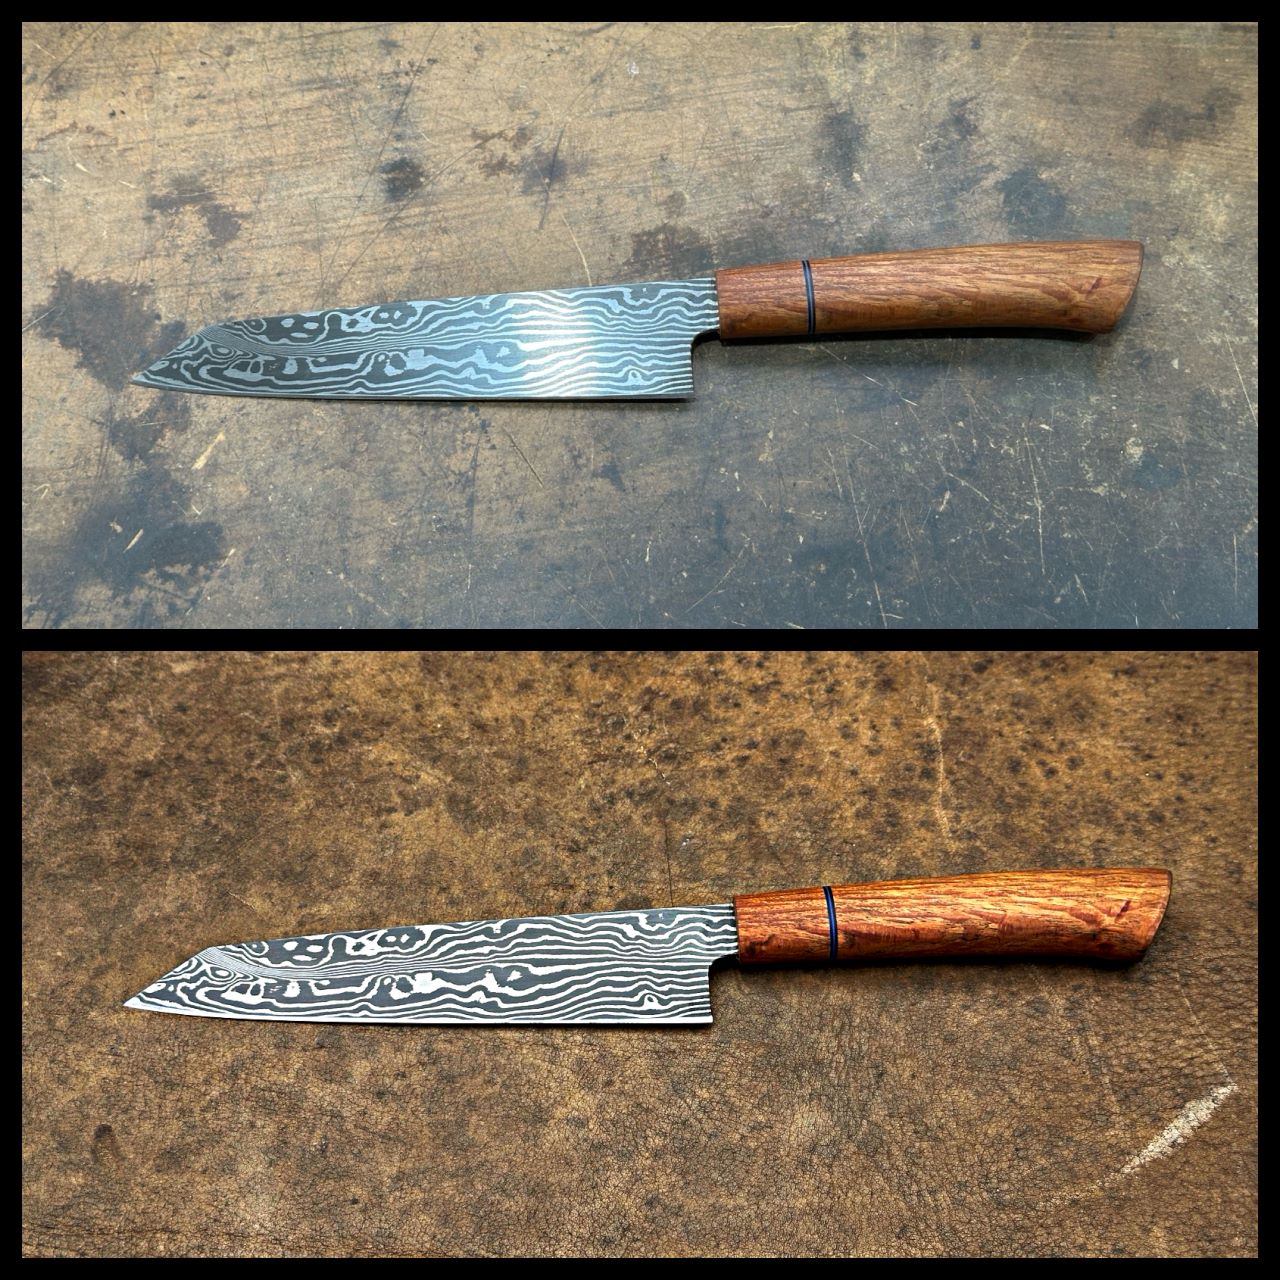
Whether you are wanting to sell your handcrafted knives or just document the progress on your knife making journey, quality photographs are an essential element. The process of correctly photographing your knives can also help you as part of your final review process, examining the knife from multiple angles and reviewing each of its unique features. Many knifemakers are masters of their craft, but their ability to capture the knife in a high quality image that reflects the skill that has gone into it can be lacking.
We run quite a lot of knifemaking courses at Tharwa Valley Forge, so it’s no surprise that we field a lot of questions from students about how to get into knifemaking at home.
As with any creative pursuit, we meet a lot of people who delay getting into knifemaking because they are overwhelmed by options; at the other extreme we see quite a few people who rush out and buy a huge amount of expensive equipment but don’t have any idea how to use it.
Read more: Beginning Knifemaking - What Equipment Do I Need?
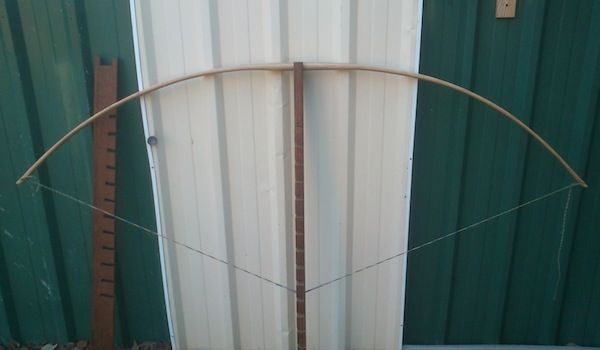
One essential piece of bow making hardware is the tillering stick. Some people hate it, deriding it because to use it requires the bow to be left on it under tension. These people usually have something fancy with pulleys and very long ropes that allow them to draw the bow from the other side of the room and see the bow flex from a distance.
I am sure these devices work well for those that use them. I have not so couldnât say for sure. I donât know how many bows Iâve made; into the hundreds perhaps. But I canât remember the last one I made without a tillering stick.
For me, the tillering stick is a wonderfully simple device that makes tillering easy.
What do I need to make a bow?
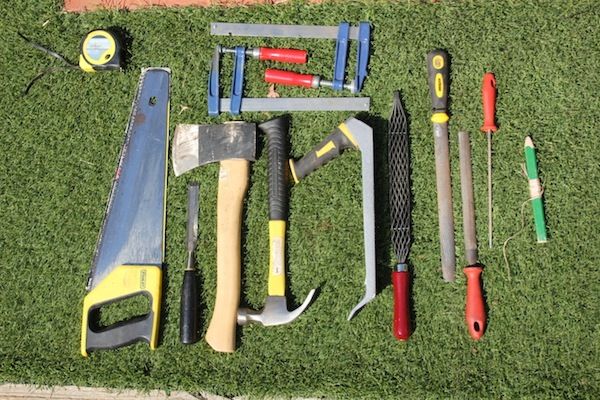
Many tutorials and buildalongs on the web assume the bowyer (or bow maker, whichever you prefer) already has a great trove of tools available to make that precious first bow.
Of course, not everyone has a fully kitted out workshop with all the best equipment. Some people have almost nothing but enthusiasm and some plans for a fearsome longbow or elegant flatbow. This article is aimed at just such a bowyer: the person who is keen to make a bow but has little hardware to get started.
Fortunately, there are only a few tools which can be considered truly essential for making a longbow or flatbow. With the tools in this article, you certainly wonât get a bow to tiller stage as quickly as with a bandsaw and belt grinder, but it will be accurate, and the end product will look identicalâ¦provided your hand is steady.

I had a name stamp made up for marking my knives some time ago, but hadn't worked out a way to cleanly mark the blade. If you hold the stamp and hit it with a hammer, you often get a double mark or shadow, or one side deeper than the other. I tried a deadblow hammer, but it wan't strong enough to mark it.
After messing around unsuccessfully with a number of options I thought of using my Number 6 Flypress. Plenty of punch and control with the 6 ton hit. I made a holder for it out of some old wagon axle on the lathe. Steps for making it below, the sizing will depend on your stamp size, you'll be able to work it out.
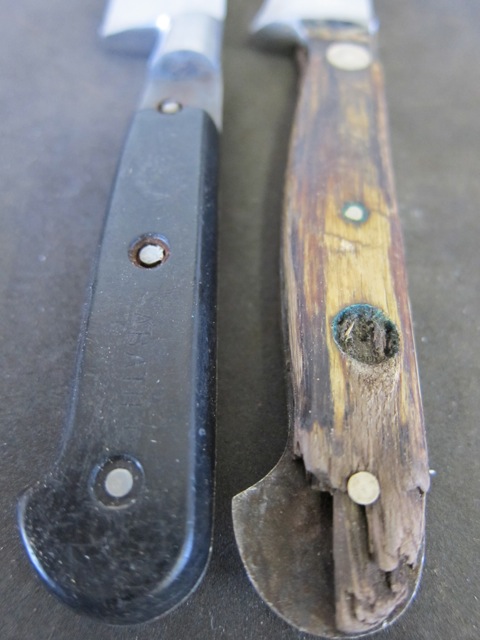
I spend a lot of time re-handling knives that have not been looked after. The most common form of abuse is the dishwasher. The harsh chemicals, hot water and steam will crack a plastic or wooden handle over time. It also corrodes the rivets used in fixing the handle slabs on. So the time comes to re-handle. Some modern knives are not worth re-handling, but older carbon steel blades (that are difficult to find now) are always worth the effort. Expecially if they have some sentimental value. So in the following gallery are some step by step instructions on how to re-handle a full tang knife.
To look after you new handles - please no dishwashers, keep the handled oiled after use and when cleaning the blade do a "bachelor wash" by holding the blade under hot water, a quick wipe to clean, they dry the blade and handle and put straight away in your knife block or magnet. It should last another few generations if looked after.
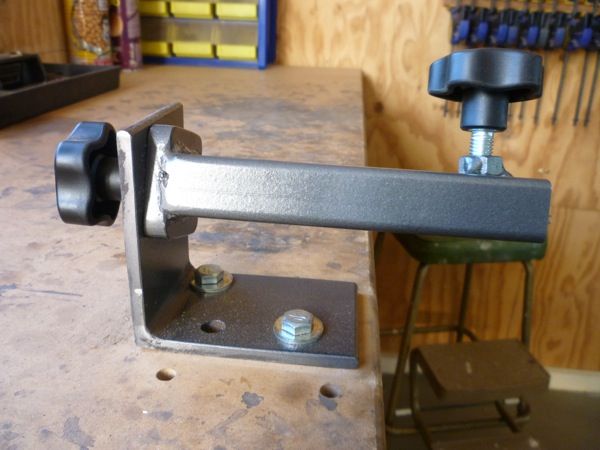
Mark II of our knife vice is much stronger and easier to adjust, thanks to some nice knurls with M10 threads. Simple to make - a strong piece of angle iron, a scrap of 10mm flat bar, 200mm of rectangular section, an M10 nut (or what ever suits your bolt), a washer, some scrap 3mm MDF and two M10 bolts with a knurled end. Drill a 10mm hole in the back of the angle iron and in the front of the rectangular section. Drill an 8.5mm hole in the scrap of 10mm and tap an M10 thread, weld the nut onto the rectangular section and then the 10mm piece on the back. Clean up, paint and assemble.
Unscrew the back to move, and do up to lock. Simple.
More photos below
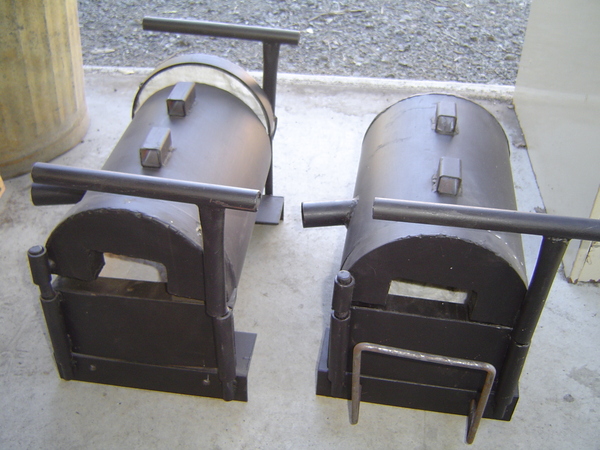
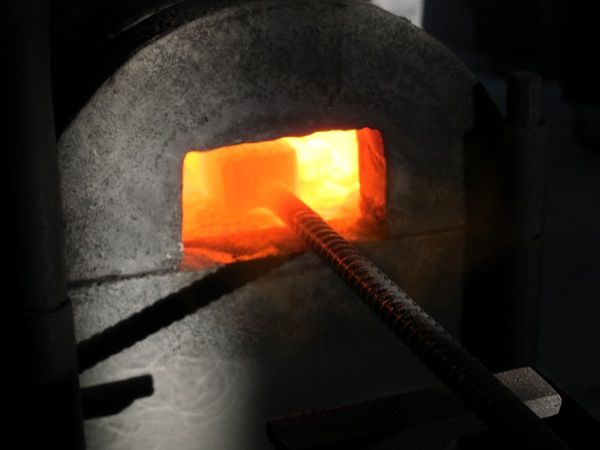
Here's a tutorial on how to make a propane gas forge out of bits and pieces. It's not too hard, it just takes some time and some scrap steel. There are lots of ways to make a forge, this one suits my needs. It can be made with a single opening or a double opening for long pieces. The parts can be improvised, but note the bigger the forge cavity - the harder it will be to heat.
Feel free to use and develop the ideas. We accept no responsibility on the use of forges you make with this information. Please be careful as working with gas can be dangerous and possibly fatal. I accept no liability for any injury which may occur by you following these pictures. They are intended for your information.
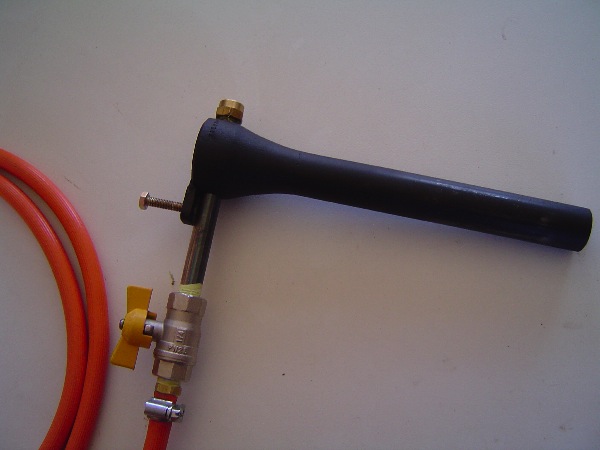
Please be careful when working with gas. If you don't know what you are doing, find someone who does.
Some thoughts on using the LPG (propane) forge, is it not meant to be a definitive guide and it is to be used at your own risk.